1. Start by painting the front section, sides and back of your tray (no need to paint where your photos will go) in your choice of colour (I used white). Leave to dry.
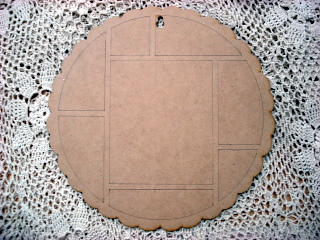
2. Trace with a pencil/fine tip pen around each frame onto the back section of your tray (see photo). Make sure you position the back of the tray correctly with the hanging hook at the top.

4. Now position your photos onto the matching drawn template, adhere. Repeat for all photos.
5. Do the same for all of the patterned paper (as per photo). Then cut out lace to fit right bottom corner frame then glue lace over the top of paper.

6. Next to your 4"x 6" photo cut a piece of patterned paper to fill gap. Glue down lace next to photo and attach pearl strip. Please note: I have also glued the self adhesive pearls down for extra security.
7. Now get out all of your chipboard pieces. Start by covering pieces with Dimensional Magic or Glossy Accents and shake glitter glass over glue, shake off excess glitter. Do the same for all chipboard pieces but please note the bird is in pink glitter glass. Once dry, attach to your tray with Dimensional magic or Glossy accents (as per photo).

8. Please note for the title I have used my own personal rub on, you may wish to put your own title on.
9. Now glue your two pieces together. Please be careful not to use too much glue as it will ooze out of the sides! If this does happen, use a paintbrush to gently wipe away excess glue. Hold together with pegs whilst drying.
10. Lastly, glue down your Prima flower vine around the edge of your frame. I also used pegs to hold down while it was drying. You may wish to softly ink the edges of your tray to finish it off.

Thanks From The Girls At Fred.
No comments:
Post a Comment